

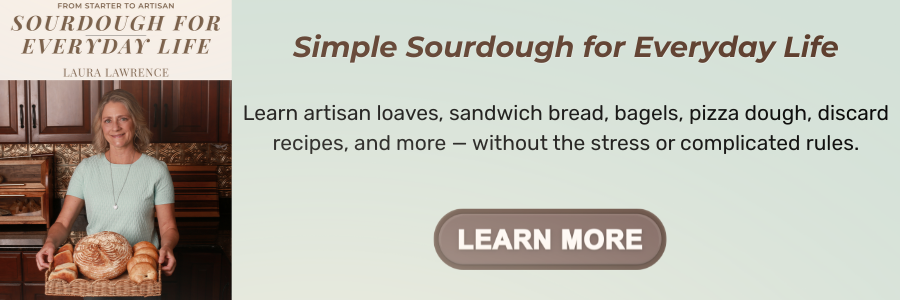
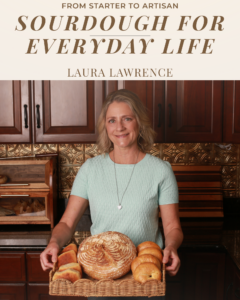
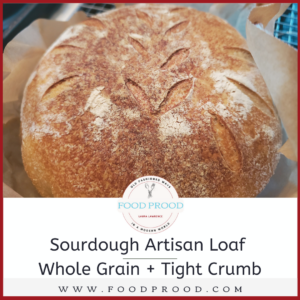
Sourdough Artisan Fancy Easy Loaf with a Tight Crumb

In this recipe + full video let me show you how I create this Sourdough Artisan Fancy Easy Loaf with a Tight Crumb the easy way with whole grain.
I love making this for soups and toast. It’s a small crumb so it actually holds all your butter! Now that’s what I’m talkin’ about. I’ll throw around some “fancy” terms but don’t let them scare you, it’s just to make it sound harder than it really is.
Let’s NOT make this complicated people, it’s bread. Darn tootin’ delicious bread!
Terms like “autolyze” – that’s just letting the grains soak up the liquid so you can better tell the hydration of your dough and “tight crumb” – this refers to all the holes in the dough itself after it’s baked. I actually break the rules by adding in all the ingredients during this part. 😉
Do you need a stand mixer? Nope, you can certainly do this quite easily with your hands and some muscle. I just happen to cheat and use it.
I also do not measure in grams, good ol fashion cups for me it is!
How long does this take? It’s over a 2 day process but mostly hands off. The stretch & fold sessions can be timed or not, I randomly walk into my kitchen and will do them, then cover and walk away until I remember again. Don’t be scared of the 3 pages when you print the recipe either 😉
Ingredients:
- 1 Cup starter (any level will work)
- 1 Cup water
- 2 Teaspoons salt
- 3 Cups flour (I personally do 1 cup all purpose and 2 cups freshly milled whole grain)

Directions:
- Start in the morning on day 1. Mix all ingredients in a bowl or stand mixer attached with the dough hook. Turning on low mix for 1 to 2 minutes until mixed together. Turn off and let rest for 15 minutes. This time allows it to “autolyze” allowing you to see if the dough is to dry or wet.
- Turn back on the mixer to low and knead for 5 minutes. At this point you can add in an additional tablespoon of water or flour if needed. The dough can be slightly tacky/sticky.
- Cover and let rest for 1 hour or so (I’ve done this in many different time intervals and it all works the same)
- Perform a set of stretch and folds. This is done by pulling one corner up & over the dough, repeating on all 4 sides. (See in video). The larger your stretch and folds are seems to yield a bigger crumb.
- Cover, let rest for 1 hour or so. Perform another set of stretch and folds. Do this for a total of 4-6 times.
- At the 4th, 5th or 6th time it is time to shape the dough. This is how I shape my dough (seen in video). Put your dough on the counter and slightly turn and pull towards you (adding flour on the counter if needed). I’ll do this a few times and place back into the bowl. Cover and let rest for 1 hour.
- Remove the dough and shape again. I’ll shape this about 2 or 3 times.
- Using a banneton bowl (or another type of bowl), line with cheese cloth and sprinkle flour generously. Place your dough into the cheesecloth that’s in the bowl and cover with plastic wrap.
- Place in the fridge overnight to allow it to do a bulk cold ferment.
- Day 2 in the morning. Remove the banneton from the fridge and allow it to set on the counter. Preheat your oven to 500° F with your dutch oven (lid on) in the oven.
- While it’s preheating grab some parchment paper that will be large enough for your dutch oven. Remove the plastic wrap from your bowl and place the parchment paper on top and carefully flip over onto the counter. Remove the bowl and cheese cloth.
- Once oven is fully preheated remove the dutch oven and lid from the oven with hot pads. Remove the lid and place your loaf into the dutch oven.
- Using a scoring blade or knife carefully slit two or more deep scores into your dough. Sprinkle or spray with water. Replace the lid.
- Bake for 20 minutes with the LID ON. After 20 minutes remove the lid and turn down your oven to 450° F and bake for an additional 20 minutes.
- You can tell your bread is done by doing a thump test. Does it sound hollow? It’s fully baked. Remove from oven and allow to cool down completely before slicing.
WANT A BIGGER CRUMB? Make your stretch and folds stretch longer in wrapping.


Click on an image to get started!


Recommended Items


